This was my first try at a color INKspiration challenge. This picture is so beautiful! These colors just speak to me - I had to jump in. I hope you like my creation. The picture of the beach, along with these instructions, were provided:
"As well as the chosen colour combination, Tranquil Tide, Bermuda Bay, Whisper White, Calypso Coral and Blushing Bride, you may also add, Very Vanilla, Basic Black and metallics to your project."
And this is the inside.
So let's walk through how to make this card:
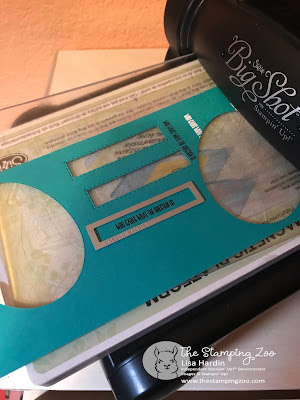
First of all, we need to do some Big Shot-ing. We looove the Big Shot! It is the best precision die cutting and embossing tool around, and it takes your paper crafting to the next level. It is best to stamp your sentiments first, then die cut them. That way your sentiment is perfectly centered, no matter where you stamped it on the paper. I cut the two sentiments out with the smallest rectangle die, 5/8" x 2 1/2".
I colored the cake with a Calypso Coral and Bermuda Bay colored pencil. We do not have a Blushing Bride watercolor pencil but no worries. I stamped some of the ink directly from the stamp pad onto an acrylic block. Then I dipped a blender pen into that "palette" and added it to my cake. This can be done with any of the ink pads, which is one of many ways to use the ink pads. Very versatile! I stamped the cake stand directly onto the oval, then colored it with the Bermuda Bay watercolor pencil. It is a tonal look that I like - interest without an added layer.
You will want to stamp two cakes and punch them out. You will only be coloring one of them.
I cut this oval using the largest oval die in the Stitched Framelets set, approx. 3 1/4" x 2 3/8". You will glue the plain cake directly onto the oval. Then, you pop your colored cake up on mini-dimensionals and attach it directly over the plain white cake. That give your card even more layered detail. It's all in the details!
For the card base I used the Gold Foil Edged cards and envelopes. Fancy - and premade and all ready for you. To pop up the sentiment on the front, attach the mini sequin trim onto the back of the left-hand side of the sentiment with a few mini-glue dots. I like to "sandwich" the trim in between two glue dots. Then add three mini-dimensionals to the rest of the sentiment rectangle.
For the inside, I first glued down the Calypso coral stitched rectangle piece. Then I took a small floral stamp from the set and stamped it three times inside the card. In order to stamp this in a straight line, I took a scrap piece of purple paper (just use some lightweight paper and I think a contrasting color is helpful) and lined it up with a line on my grid paper. Then I stamped from right to left three times. Voila - a straight line of stamped flowers. Looks difficult - but you only need to rely on your graph paper!
Then attach the inside sentiment to complete the color blocking look.
Product List


